为什么要添加这个“内容管理系统”

  • 如果没有添加cms的话,正常写作博客时需要先在本地写好,再通过git push到github,这一过程较为繁琐,通过cms这种方式就可以实现在线形式的编写博客体验。

开始

项目配置

  • 在hexo项目的source目录下创建admin目录,添加以下两个文件:
1
2
3
admin
├ index.html
└ config.yml
  • index.html文件内容
1
2
3
4
5
6
7
8
9
10
11
12
13
14
<!doctype html>
<html>
<head>
<meta charset="utf-8" />
<meta name="viewport" content="width=device-width, initial-scale=1.0" />
<meta name="robots" content="noindex" />
<title>Content Manager</title>
</head>
<body>
<!-- Include the script that builds the page and powers Decap CMS -->
<script src="https://unpkg.com/decap-cms@^3.0.0/dist/decap-cms.js"></script>
<!--上面的代码script是从unpkgCDN 加载的。如果有任何问题,jsDelivr可以用作替代来源。只需将其设置src为https://cdn.jsdelivr.net/npm/decap-cms@^3.0.0/dist/decap-cms.js-->
</body>
</html>
  • config.yml文件内容
1
2
3
4
5
6
7
8
9
10
11
12
13
14
15
16
17
18
19
20
21
backend:
name: git-gateway
branch: main # Branch to update (master by default)

# These lines should *not* be indented
media_folder: 'source/images' # Media files will be stored in the repo under source/images
public_folder: 'images' # The src attribute for uploaded media will begin with images

# This line should *not* be indented
publish_mode: editorial_workflow

collections:
- name: 'Post' # Used in routes, e.g., /admin/collections/blog
label: 'Post' # Used in the UI
folder: 'source/_posts' # The path to the folder where the documents are stored
create: true # Allow users to create new documents in this collection
slug: '{{slug}}' # Filename template, e.g., YYYY-MM-DD-title.md
fields: # The fields for each document, usually in front matter
- {label: 'Title', name: 'title', widget: 'string'}
- {label: 'Publish Date', name: 'date', widget: 'datetime'}
- {label: 'Body', name: 'body', widget: 'markdown'}
  • 完成以上文件的创建后,修改项目根目录的_config.yml文件,跳过对source/admin的渲染:
1
skip_render: admin/**

netlify配置

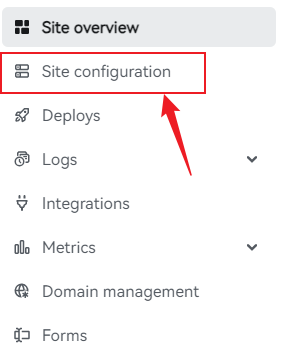
  • 打开netlify,点击自己部署的网站,点击Site configurationpic1

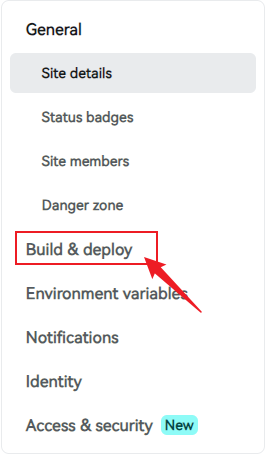
  • 点击Build & Deploypic2

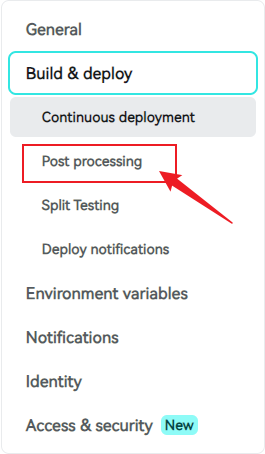
  • 点击Post processingpic3

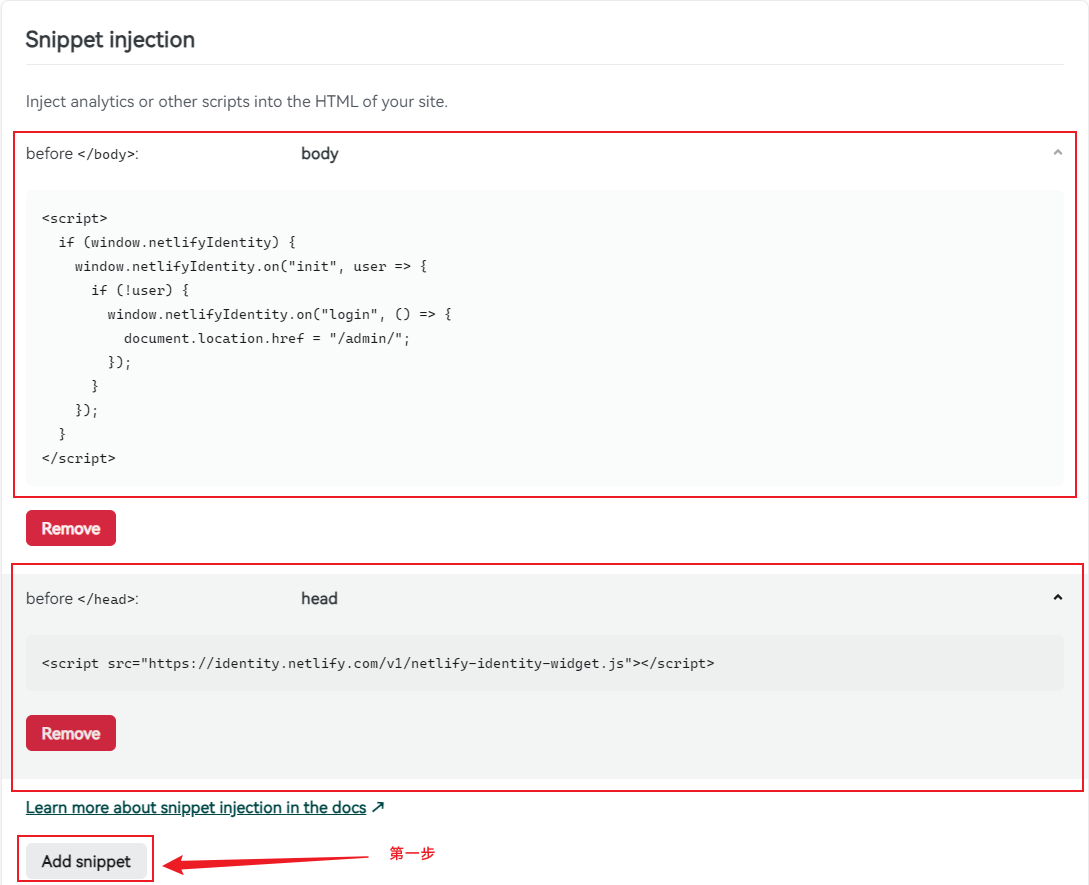
  • 点击Snippet Injection section,Add Snippet,分别添加以下内容,Script name随意填写,以下内容填入html处:

    Before</head>

1
<script src="https://identity.netlify.com/v1/netlify-identity-widget.js"></script>

Before</body>

1
2
3
4
5
6
7
8
9
10
11
<script>
if (window.netlifyIdentity) {
window.netlifyIdentity.on("init", user => {
if (!user) {
window.netlifyIdentity.on("login", () => {
document.location.href = "/admin/";
});
}
});
}
</script>

pic4

  • 回到Site configuration处,点击Identity,再点击Enable Identity启用。
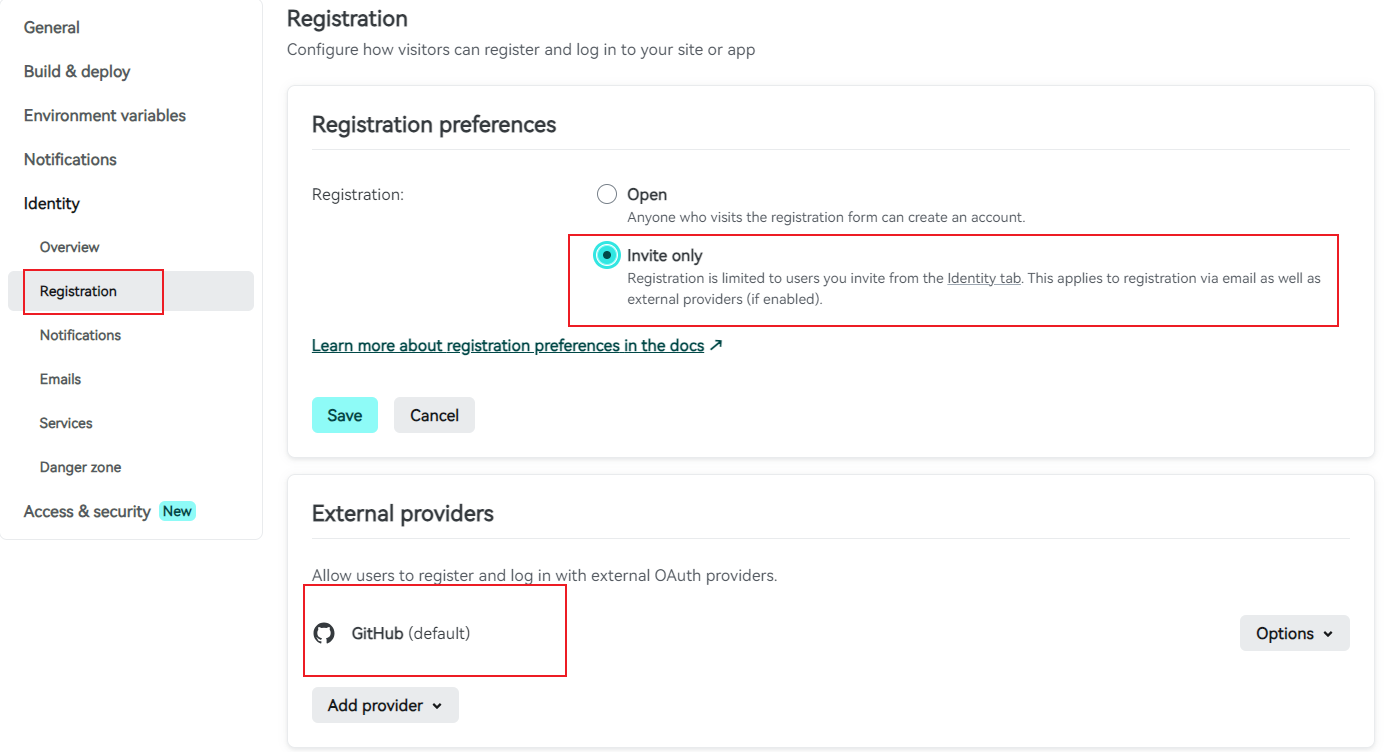
  • 启用后点击Registration,再点击Invite onlypic5
  • Registration preferences处设置为Invite only,这样就只有你邀请的人才能编辑,防止被人恶意修改。
  • External providers添加GitHub账号,可以启用使用github账户进行登录。这样好像任何人使用GitHub登录都可以修改文章了。
  • 完成以上步骤后,回到Identity处,分别点击ServicesGit GatewayEnable Git Gateway

访问

  • 完成了以上操作后,在你的博客地址后面加入/admin,就可以进入到cms的页面了,通过GitHub账号或者你邀请的email账户进行登录后,即可进行在线的博客文章编写了。pic6